For a person that loves all things vintage, quirky, cute and arty; I would say when it comes to decorating a room I am quite specific. Whether it be a living, dining or bedroom I like to 'pimp up my crib' to suit my personality. I wouldn't say I have the BEST bedroom, but I love the fact its my own space which I have had a heavy input in.
Recently what has caught my eye is the little details that make a big difference in a room. I always thought it was about the colour of paint or the right wallpaper that made a room... a room.
To my surprise I realized that it was all about the little candles, little baskets, ornaments that really showed off your personality within the room.
So basically, I went all out trying to decorate as much as I could by myself that way it would have me all stamped over it.
One of the things that I was eager to give a go are 'hanging hearts'
I think there so cute and you could hang them anywhere, on a door knob, on the curtain pole.
QUICK AND EASY WAY TO MAKE YOUR OWN HANGING HEART!!
Step 1) Choose your material
Choose any material that you would think works best, I think shabby chic fabric is by far the best. The floral print work against the polkadots and stripes is just so cute.
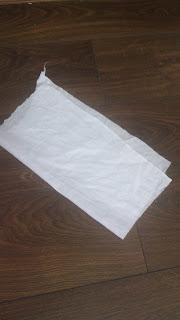
I opted for a white plain fabric just so that's easier for you lot to see what I'm doing
Step 2) Fold fabric and draw a heart
If you wanted to, you could of used a heart template, placing it on the fabric and cutting around it. I just drew straight onto the fabric, all the pen lines will be hidden away afterwards.
Step 3) Cut around the heart
You'll find that you will end up with two identical hearts, don't chuck away the scrap material, you'll need it later.
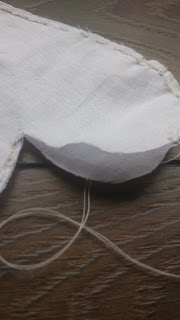
Step 4) Stitch the two hearts together
The stitching could be any type of stitch you want, as long as both the hearts are securely fastened together.
REMEMBER! Don't stitch all the way around the hearts, leave a gap somewhere, preferably at the top because you'll need to turn the hearts inside out and stuff the heart.
Step 5) Stuff the heart
In order to stuff the heart you could buy foam padding or even just wool from any arts and craft shop. However, if you don't have any which unfortunately I didn't, then using the scrap material you had left over cut lots of little squares, strips you name it. This is what you'll use to stuff your heart. After you have finished stuffing your heart (fabric heart that is, not the real thing) carry on stitching up that little gap you left, so that no padding falls out.
Step 6) Decorate!!!!
Decorate with any little bits and bobs you have. Remember the more handmade it looks, the better! Definitely use ribbon so that you can hang it somewhere
FINISHED!!!! Hang it anywhere or even have it on a shelf somewhere. Sit back and enjoy looking at your own work :)


No comments:
Post a Comment